First, what is Automatic Encoding? This feature will allow us to assign the encoding and muxing jobs all in one setup. After setting the AutoEncode, all we have to do is wait for the process to finish and voila! The encoded audio and video streams, which is separately processed and produced, plus the subtitles and chapters we extracted earlier, will be muxed into a single mkv file to contain them all.
After Clicking the AutoEncode button on the lower-right most part of the main MeGUI window, the Automatic Encoding window should pop out.
 |
| The AutoEncode window |
- A: Container - Since we want to make a mini mkv, the container should of course be mkv.
- B: Size and Bitrate - It's up to you wheter you want to make an output based on Average Bit Rate (ABR) or target File Size. The No Target Size option is most likely used when you set video encoding mode on Constant Rate Factor (CRF).
- C: Add additional content - Since I am going to encode a video with a subtitle and chapter to be included in the output, I toggled this option. (Optional)
Ignore the output file name if you toggle the Add additional content option. After all the necessary settings are done, click the Queue button on the bottom right part of window.
Step 2: Setting up the Adaptive Muxer (Optional)
 |
| The Adaptive Muxer window |
If you toggled the Add additional content option on the AutoEncode window before clicking the Queue button, the Adaptive Muxer window will pop-up next. Here we can add the additional contents we need to. In my case, I added the subtitle file(d) and the chapters file(e) that I extracted earlier by MKVToolNix. The reason why I ignored the Name of output option on the AutoEncode earlier is because I can set it at the Adaptive Muxer later(f).
After inputting the subs/chapters, and deciding for the final output name, click the Go button at the bottom right of Adaptive Muxer window.
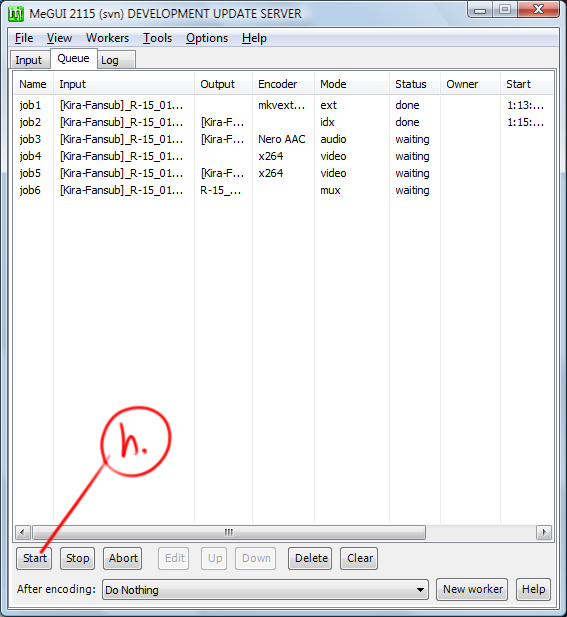 |
| Main MeGUI window, Queue Tab |
Now that we have all the necessary setting complete, the full encoding of the video is all set up. The encoding process is divided by jobs. Typically, there are at least 3 jobs that makes up a whole video re-encoding: Audio encoding, Video Encoding, and Muxing. In my example, there are four jobs, since I am using the Two-pass video encoding mode.
With this post, the whole step-by-step guide of mini mkv encoding basics is now complete. Feel free to add comments, and in case I mentioned some mistakes It would be a help for those to be pointed out.
Thank you very much for putting up this step-by-step guide. It's very useful for beginners like me. Keep up your good work! :)
ReplyDelete